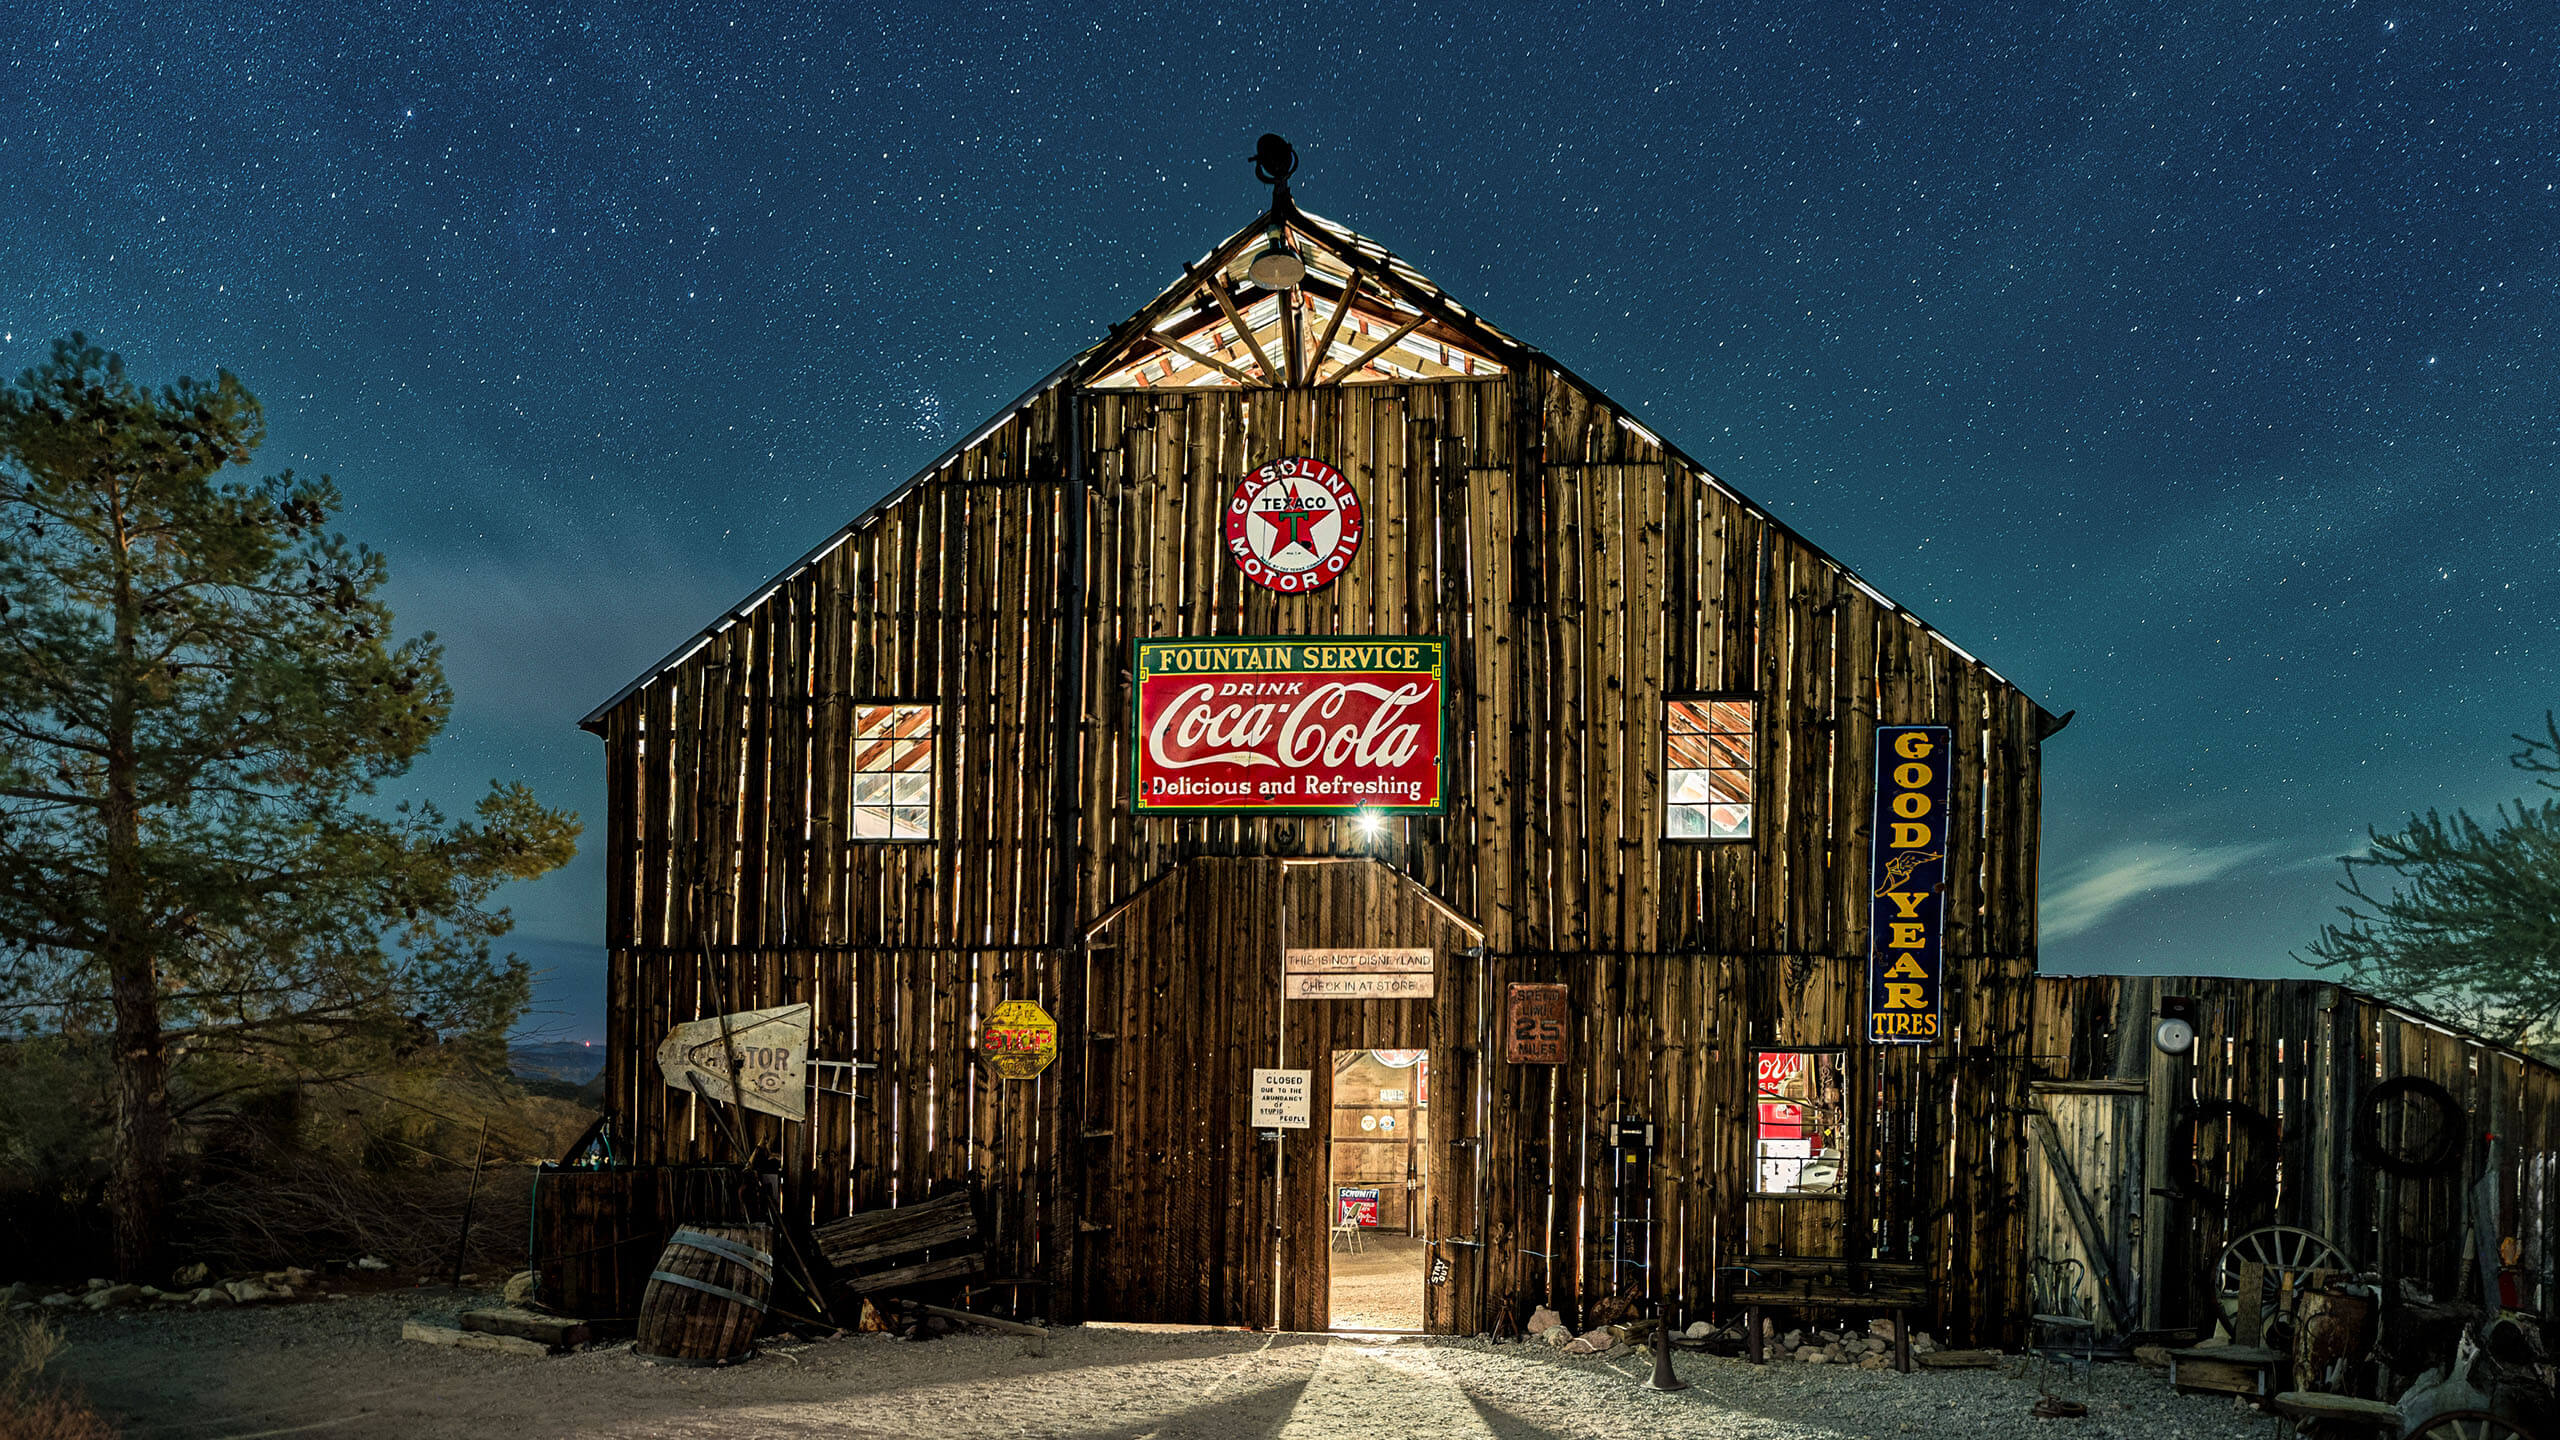
Ever want to light paint a building such as a barn so that it glows magnificently from the inside at night? Here’s how!
What is light painting?
Light painting is a term that is often used loosely to describe any addition of light to a night photograph. Really, though, light painting is a technique that uses a handheld light source to illuminate a scene during a long exposure. You are quite literally painting the scene with light. Night photographers have used this technique for many decades.
How I lit the interior of the barn to make it glow through the cracks
I set my camera on a tripod. Using the intervalometer, I locked the shutter so it would stay open until I returned to shut it off. This kept the shutter open for an unspecified amount of time.
Turning “invisible”
After that, I walked into the dark barn. I can walk around within the frame of the photo without appearing in it. Unless I stand still for at least ten percent of the exposure, I will not show up.
Continuing on, I walked throughout the barn, illuminating the walls and ceilings from within. By lighting the ceiling, walls, and items inside, I iknew they would glow through the windows, the door, and the cracks. It was therefore important that I was thorough in illuminating everything evenly so that it would look great.
I walked up to the very tall second level of the barn. There, I did the same thing, illuminating the back walls, various objects, and the ceiling.
Giving everything a nice, even “coat” of light
To make everything even, I kept the light moving. Remember, it really is like painting light onto the subject, so it’s important to get a really even “coat” of light. IF you keep the light in one place for too long, it creates “hot spots,” blowing out the details, and looking unflattering.
I also shined some light back outside through the door, just to create an interesting pattern on the ground that was glowing! Part of the fun of handheld light painting is how many angles you can create. It’s far more flexible than stationary lights, after all.
Illuminating the sign outside
After I was sure that I gave everything a nice, even “coat” of light, I walked back outside.
I shielded the light with my hand so that it would shine only at the Coca-Cola sign. Then I quickly painted on some light, just for a moment.
Checking out the photo
After illuminating the sign, I walked back to the camera. I shut off the lock on the intervalometer so that the shutter would close. The shutter had been open for 265 seconds! That’s right, it had taken me almost four and a half minutes to light paint the barn’s interior and the sign.
Getting the stars to look like pinpoints
I could have been finished with this photo. It looked great. However, I wanted to have the stars show as pinpoints of light, not star trails. I had already created a photo like this in the moonlight with star trails, so I wanted this to be different.

The previous camera setting had been 265 seconds f/2.8 ISO 400.
I set the intervalometer for just 15 seconds. I kept the aperture t he same. However, I boosted the ISO to 3200 so that it would amplify the incoming light more! This would capture the stars as pinpoints better for such a relatively short exposure compared to 265 seconds.
While post-processing, I simply blended the two photos together. The sky is the 15-second exposure. The rest of the photo is the 265-second exposure. The camera and tripod setup was the same, with one done right after the other. Most night photographers refer to this as “blending.“
There’s numerous ways of blending in Photoshop and many other programs. Here’s one way of creating a mask for blending.
And here are some light painting tools to get you started.

