10 Essential Landscape Photography Composition Tips for Stunning Photos
Master landscape photography with proven composition techniques. Learn rule of thirds, leading lines, and framing tips to create breathtaking nature photos.
Introduction: The Art of Seeing
Landscape photography is more than just pointing your camera at a beautiful vista and clicking the shutter. It’s about seeing beyond the obvious and creating compelling compositions that draw viewers into your frame. While having the right equipment like the Sony A7 IV certainly helps, mastering composition is what separates snapshot-takers from true landscape artists.
In this comprehensive guide, we’ll explore the fundamental principles and advanced techniques that will transform your landscape photography from ordinary to extraordinary. Whether you’re a beginner picking up your first camera or an intermediate photographer looking to refine your skills, these composition techniques will revolutionize how you approach landscape photography.
Understanding the Rule of Thirds
The Foundation of Strong Composition
The rule of thirds is photography’s most fundamental composition guideline, and for good reason. By dividing your frame into nine equal sections using two horizontal and two vertical lines, you create four intersection points that naturally draw the viewer’s eye.
Step-by-Step Implementation:
- Enable Grid Lines: Turn on the grid overlay in your camera’s viewfinder or LCD screen
- Position Key Elements: Place important landscape features along these lines or at intersection points
- Horizon Placement: Position your horizon on either the upper or lower third line, never in the center
- Foreground Focus: Use the lower third for compelling foreground elements like rocks, flowers, or water
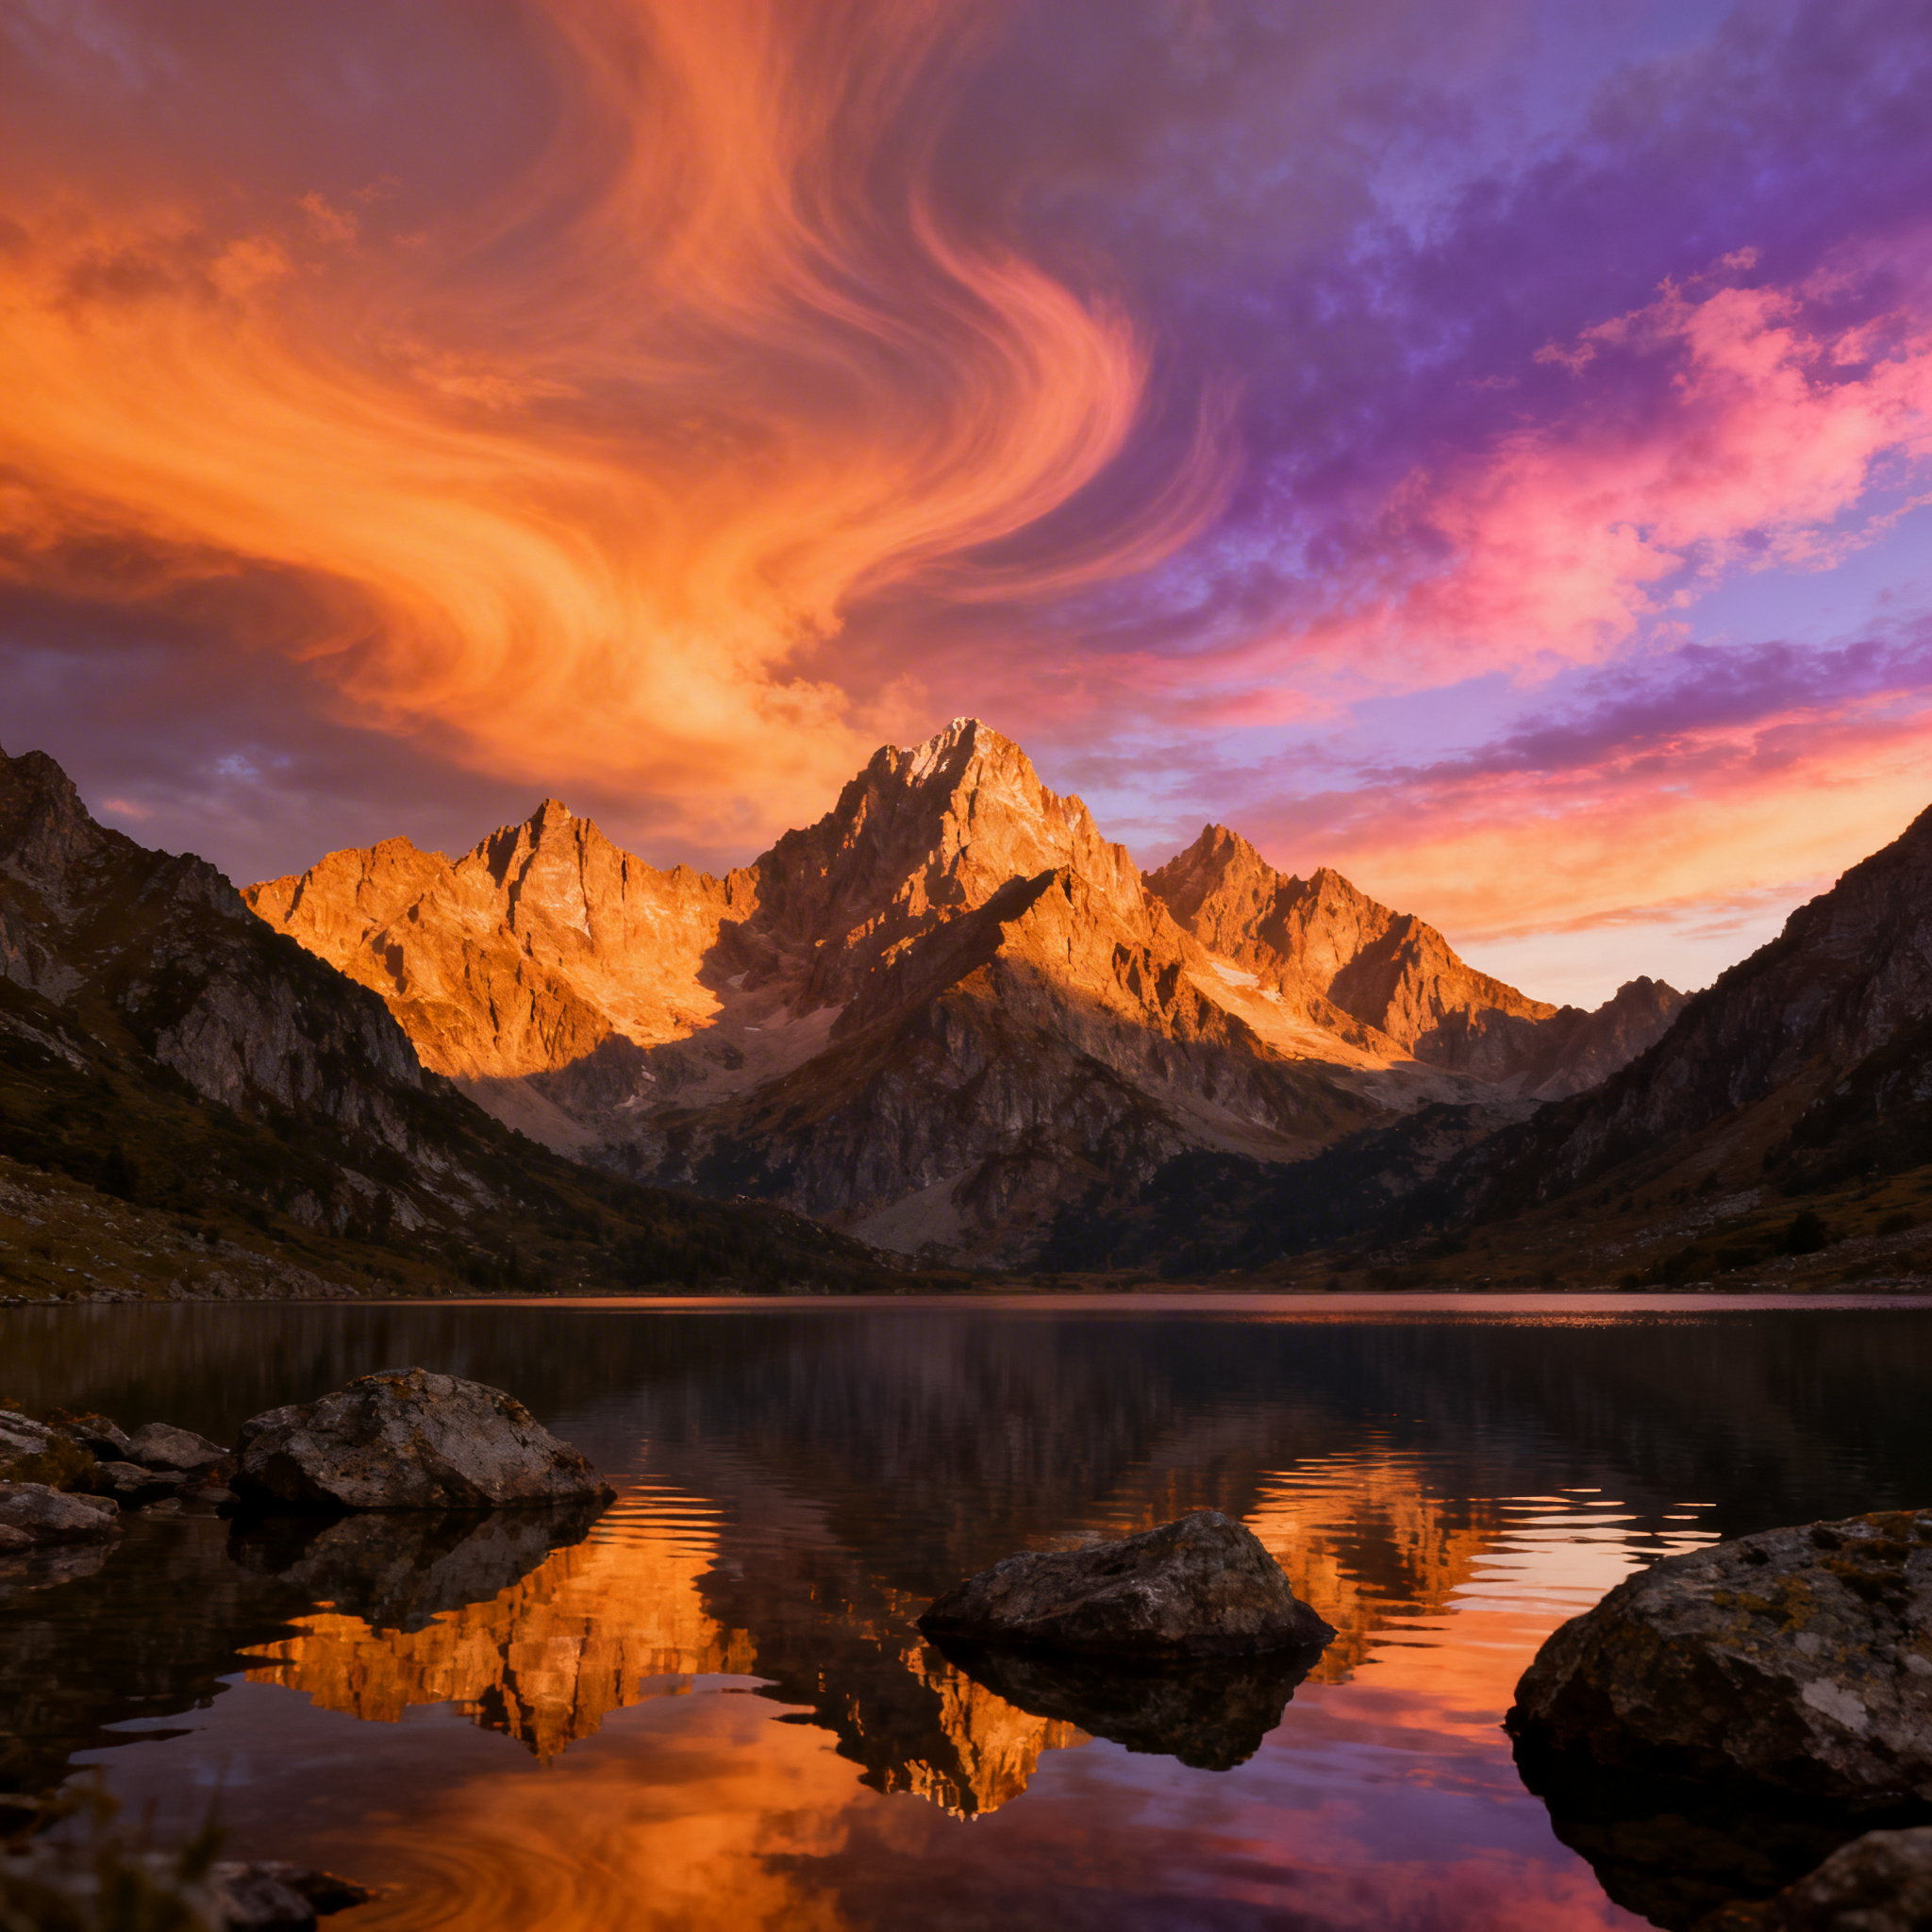
Practical Example: When photographing a mountain scene with a lake, place the mountain peaks along the upper third line, the lake surface along the lower third line, and position a prominent rock or tree at one of the intersection points.
Breaking the Rule Strategically
While the rule of thirds provides an excellent foundation, knowing when to break it demonstrates artistic maturity. Center compositions work exceptionally well for:
- Symmetrical reflections in still water
- Leading lines that draw directly toward the center
- Radial compositions like sunbursts or circular patterns
- Minimalist scenes where centered subjects create balance
Mastering Leading Lines
Creating Visual Pathways
Leading lines are perhaps the most powerful tool in landscape composition. They guide the viewer’s eye through your image, creating depth and drawing attention to your focal point.
Types of Leading Lines in Landscapes:
- Natural Lines: Rivers, coastlines, rock formations, tree lines
- Geometric Lines: Fences, roads, pier planks, stone walls
- Implied Lines: Cloud formations, wave patterns, shadow edges
Camera Settings for Leading Lines:
- Aperture: f/8 to f/11 for optimal sharpness throughout the frame
- ISO: Keep as low as possible (ISO 100-400) for minimal noise
- Shutter Speed: Varies based on movement in scene
- Focus Point: Use single-point autofocus on your main subject
Advanced Leading Line Techniques
S-Curves: Winding rivers or paths create elegant S-shaped leading lines that add grace and flow to your composition. Position yourself to emphasize the curve’s gentle sweep.
Diagonal Lines: These create dynamic energy and movement. Beach waves, slanted rock formations, or diagonal cloud patterns can transform static scenes into dynamic compositions.
Converging Lines: Multiple lines that meet at a vanishing point create powerful perspective and depth. Railroad tracks, river valleys, or rows of trees exemplify this technique.
Working with Foreground, Middle Ground, and Background
Creating Layered Compositions
The most compelling landscape photographs contain distinct layers that work together to create depth and visual interest. This three-dimensional approach transforms flat images into immersive experiences.
Foreground Strategies:
- Get Low: Crouch or lie down to emphasize foreground elements
- Wide-Angle Lenses: Use 14-24mm lenses to include expansive foregrounds
- Focus Stacking: Combine multiple images for front-to-back sharpness
- Interactive Elements: Include foreground objects that relate to your background
Step-by-Step Layered Composition:
- Scout Your Foreground: Find interesting rocks, flowers, driftwood, or patterns
- Position Carefully: Move around to align foreground with background elements
- Check Your Depth: Ensure clear separation between layers
- Fine-Tune Angles: Small position changes dramatically affect relationships between layers
Hyperfocal Distance Technique
To keep all three layers sharp:
- Calculate Hyperfocal Distance: Use apps like PhotoPills or HyperFocal Pro
- Set Manual Focus: Focus at the hyperfocal distance for your aperture
- Use Focus Peaking: Enable this feature to verify sharp areas
- Double-Check: Use your camera’s depth of field preview button
Light and Timing for Better Composition
The Golden Hours
Light quality dramatically affects how compositional elements appear in your frame. The best landscape photography happens during specific lighting conditions.
Optimal Shooting Times:
- Golden Hour: 30-60 minutes after sunrise and before sunset
- Blue Hour: 20-30 minutes after sunset and before sunrise
- Overcast Days: Perfect for waterfalls, forests, and intimate landscapes
- Storm Light: Dramatic skies with selective lighting on landscapes
Camera Settings for Different Light:
Golden Hour Settings:
- Aperture: f/8-f/11
- ISO: 100-200
- Shutter Speed: 1/60s - 1/250s
- White Balance: Daylight or slightly warm
Blue Hour Settings:
- Aperture: f/8
- ISO: 400-800
- Shutter Speed: 1-30 seconds
- Use tripod for stability
Directional Light Composition
Front Lighting: Even illumination but can appear flat. Best for colorful subjects like wildflower fields.
Side Lighting: Creates texture and dimension through shadows. Excellent for mountain ridges and rock formations.
Back Lighting: Produces dramatic silhouettes and rim lighting effects. Perfect for trees, people, or distinctive shapes.
Advanced Composition Techniques
Framing and Natural Frames
Natural frames direct attention to your main subject while adding context and depth to your composition.
Effective Natural Frames:
- Tree branches overhead
- Cave openings or rock arches
- Overhanging cliffs
- Foreground vegetation
Implementation Steps:
- Identify Frame Elements: Look for natural openings or overhanging features
- Position Strategically: Move to align the frame with your subject
- Check Focus: Decide whether to keep the frame sharp or slightly soft
- Mind the Edges: Ensure frame elements don’t create distracting cut-offs
Symmetry and Reflections
Perfect reflections create powerful symmetrical compositions, but they require specific conditions and techniques.
Reflection Photography Steps:
- Find Still Water: Early morning often provides the calmest conditions
- Use Polarizing Filter: Control reflections and reduce glare
- Level Your Camera: Ensure the horizon line is perfectly straight
- Focus Carefully: Focus on your main subject, not the reflection
- Consider Breaking Symmetry: Small disruptions can add interest
Scale and Perspective
Including human elements or recognizable objects helps viewers understand the grandeur of your landscape.
Scale Indicators:
- People (hikers, photographers)
- Buildings or structures
- Trees or known vegetation
- Animals or birds
Positioning for Scale:
- Strategic Placement: Position scale elements using rule of thirds
- Maintain Proportion: Don’t let scale elements dominate
- Color Coordination: Choose clothing or objects that complement the scene
- Safety First: Never compromise safety for a photograph
Essential Camera Settings and Equipment
Camera Settings for Sharp Landscapes
Aperture Priority Mode (A/Av):
- Sweet Spot: f/8 to f/11 for optimal lens sharpness
- Depth of Field: f/16 for maximum depth (watch for diffraction)
- Creative Control: f/2.8-f/5.6 for selective focus effects
ISO Management:
- Base ISO: Always start with your camera’s lowest native ISO
- Noise Tolerance: Modern cameras like the Sony A7 IV handle ISO 1600-3200 well
- Exposure Triangle: Balance ISO with aperture and shutter speed
Sony A7 IV Specifications for Landscape Photography
| Specification | Details | Landscape Benefit |
|---|---|---|
| Resolution | 33MP Full Frame | Excellent detail for large prints |
| ISO Range | 100-51,200 | Great low-light performance |
| Image Stabilization | 5-axis IBIS | Sharp handheld shots |
| Weather Sealing | Yes | Reliable in harsh conditions |
| Dynamic Range | 15 stops | Captures wide tonal range |
| Focus Points | 759 phase-detection | Precise focusing anywhere |
Essential Accessories
Must-Have Accessories:
- Sturdy Tripod: Carbon fiber for weight savings
- Polarizing Filter: Reduces reflections and enhances skies
- Neutral Density Filters: Enables long exposures
- Remote Shutter Release: Prevents camera shake
- Lens Cleaning Kit: Maintains optical quality
Common Composition Mistakes to Avoid
Tilted Horizons
The Problem: Crooked horizons immediately signal amateur photography and distract viewers from your composition.
The Solution:
- Use your camera’s built-in level
- Enable horizon indicators in the viewfinder
- Correct minor tilts in post-processing
- For extreme angles, make them obviously intentional
Cluttered Compositions
The Problem: Including too many competing elements confuses the viewer and weakens impact.
The Solution:
- Simplify your compositions
- Use longer focal lengths to isolate subjects
- Move position to eliminate distracting elements
- Wait for better conditions if necessary
Ignoring Weather Conditions
The Problem: Shooting only in perfect weather limits creative opportunities.
The Solution:
- Embrace storm clouds for dramatic skies
- Use fog and mist for mysterious moods
- Photograph in rain for saturated colors
- Snow transforms familiar landscapes
Post-Processing for Better Composition
Cropping for Improved Composition
Sometimes the best composition emerges in post-processing through strategic cropping.
Cropping Guidelines:
- Maintain Aspect Ratios: Use standard ratios (3:2, 4:3, 16:9) for versatility
- Strengthen Leading Lines: Crop to emphasize directional elements
- Remove Distractions: Eliminate edge distractions through cropping
- Consider Print Sizes: Plan crops based on intended output
Enhancing Compositional Elements
Local Adjustments:
- Graduated Filters: Balance exposure between sky and land
- Radial Filters: Subtly guide attention to focal points
- Masking Tools: Enhance specific compositional elements
- Color Grading: Create mood and atmosphere
Seasonal Composition Strategies
Spring Photography
Compositional Opportunities:
- Wildflower foregrounds with distant mountains
- Fresh green foliage as natural frames
- Rushing water from snowmelt
- Dramatic spring storm clouds
Summer Compositions
Unique Elements:
- Long days for extended shooting windows
- Alpine lake reflections
- Thunderstorm drama
- Lush vegetation and full trees
Fall Color Photography
Composition Techniques:
- Colorful canopies as natural umbrellas
- Fallen leaves as foreground textures
- Mixed evergreen and deciduous contrasts
- Overcast light for color saturation
Winter Landscape Composition
Special Considerations:
- Minimalist compositions with snow
- Bare tree silhouettes
- Ice formations and patterns
- Extreme weather drama
Building Your Compositional Eye
Practice Exercises
Weekly Challenges:
- Single Location, Multiple Compositions: Visit one spot and create five different compositions
- Constraint Photography: Use only one focal length for a month
- Weather Documentation: Photograph the same scene in different conditions
- Foreground Focus: Spend sessions concentrating only on foreground elements
Studying Master Photographers
Learn from landscape photography masters:
- Ansel Adams: Zone system and dramatic black and white compositions
- Marc Adamus: Complex digital compositions and light manipulation
- Michael Kenna: Minimalist long-exposure work
- David Thompson: Color relationships and natural light
Conclusion and Recommendations
Mastering landscape photography composition is a journey of continuous learning and refinement. The techniques covered in this guide provide a solid foundation, but the real learning happens in the field through consistent practice and experimentation.
Key Takeaways:
- Master the Basics: Rule of thirds, leading lines, and layered compositions form your foundation
- Understand Light: Timing and light quality are as important as compositional techniques
- Equipment Matters: Invest in quality gear like the Sony A7 IV for consistent, professional results
- Practice Regularly: Composition skills develop through repetition and conscious effort
- Study and Analyze: Learn from masters and critically evaluate your own work
Recommended Next Steps:
- Start with one technique and master it before moving to the next
- Create a practice schedule with specific compositional goals
- Join photography communities for feedback and inspiration
- Plan shoots around optimal lighting conditions
- Experiment with both traditional and unconventional compositions
Remember that great landscape photography combines technical proficiency with artistic vision. While these compositional guidelines provide structure, don’t be afraid to break rules when your artistic instincts suggest a different approach. The landscape is your canvas, and composition is your brush – use both thoughtfully to create images that not only document beautiful places but also convey the emotions and experiences they inspire.
The journey to mastering landscape photography composition never truly ends. Each location presents new challenges and opportunities, and each changing light condition offers fresh perspectives on familiar scenes. Embrace this continuous learning process, and your compositional skills will evolve naturally, leading to increasingly powerful and emotionally resonant landscape photographs.
Related Tags
Looking for the Best Camera Deals?
Check out our latest buying guides and comparison articles to find the perfect camera for your needs.
Browse Buying Guides