Master Macro Photography: 7 Pro Techniques for Amazing Close-Ups
Learn essential macro photography techniques to capture stunning close-up shots. Discover lighting tips, focus stacking, and camera settings for pro results.
Getting up close and personal with your subjects opens up an entirely new world of photographic possibilities. Macro photography allows you to capture intricate details that are invisible to the naked eye, transforming ordinary objects into extraordinary works of art. Whether you’re photographing delicate flower petals, fascinating insects, or textured surfaces, mastering macro techniques will elevate your photography to new heights.
In this comprehensive guide, we’ll explore the essential techniques, equipment, and settings needed to create stunning macro photographs that will captivate your audience and showcase the hidden beauty in our world.
Understanding Macro Photography Fundamentals
Macro photography is traditionally defined as capturing subjects at a 1:1 reproduction ratio or greater, meaning the subject appears life-size or larger on your camera’s sensor. This level of magnification reveals details that are typically overlooked, creating images with incredible impact and visual interest.
The key to successful macro photography lies in understanding three critical factors: magnification, working distance, and depth of field. These elements work together to determine the final appearance of your images and present unique challenges that require specific techniques to overcome.
Magnification and Working Distance
True macro lenses offer 1:1 magnification at their closest focusing distance, but many photographers work successfully with magnification ratios from 1:2 to 1:4. Higher magnification brings you closer to your subject but reduces your working distance – the physical space between your lens and subject.
Working distance becomes crucial when photographing living subjects like insects or when you need room for lighting equipment. A longer working distance gives you more flexibility but may require longer focal length macro lenses to achieve the desired magnification.
Essential Equipment for Macro Photography
Macro Lenses
Dedicated macro lenses are purpose-built for close-up work and offer several advantages over other lens types. They provide excellent image quality at close focusing distances, flat field characteristics for sharp edge-to-edge detail, and convenient 1:1 magnification ratios.
Popular focal lengths include 60mm, 90-105mm, and 180mm macro lenses. Shorter focal lengths are more affordable and compact but require you to get very close to your subjects. Longer focal lengths provide more working distance, making them ideal for skittish insects or situations where you need space for lighting.
Extension Tubes and Close-Up Filters
If you’re not ready to invest in a dedicated macro lens, extension tubes offer an affordable alternative. These hollow tubes fit between your camera body and existing lenses, reducing the minimum focusing distance and increasing magnification. They work with any lens but are most effective with normal and telephoto focal lengths.
Close-up filters, which screw onto the front of your lens like a magnifying glass, provide another budget-friendly option. While they’re convenient and don’t affect exposure, they may reduce image quality compared to extension tubes or dedicated macro lenses.
Tripods and Focusing Rails
Stability becomes paramount in macro photography due to the shallow depth of field and high magnification. Even the slightest camera movement can result in blurry images. A sturdy tripod is essential for sharp macro photographs, especially in low light conditions or when using smaller apertures.
Focusing rails allow precise positioning adjustments when your subject and camera are both stationary. These rails enable you to fine-tune your composition and achieve perfect focus by moving the camera forward and backward in tiny increments.
Camera Settings for Sharp Macro Images
Aperture Selection Strategy
Aperture choice in macro photography requires balancing depth of field with image sharpness. While your instinct might be to use the smallest aperture possible for maximum depth of field, diffraction can reduce overall image sharpness at apertures smaller than f/11 or f/16.
The optimal aperture range for most macro work falls between f/8 and f/11, providing a good balance between depth of field and lens sharpness. When you need more depth of field, consider focus stacking techniques rather than simply closing down the aperture further.
Focus Stacking for Maximum Sharpness
Focus stacking involves taking multiple images at different focus points and blending them together in post-processing to create a single image with extended depth of field. This technique allows you to maintain optimal lens sharpness while achieving the depth of field that would be impossible with a single exposure.
Step-by-step focus stacking process:
- Mount your camera on a sturdy tripod
- Compose your shot and switch to manual focus
- Focus on the nearest part of your subject
- Take your first shot
- Slightly adjust focus toward the back of the subject
- Continue taking shots until the entire subject is covered
- Process images using focus stacking software
Popular software options for focus stacking include Photoshop, Helicon Focus, and Zerene Stacker. Each program has its strengths, with some excelling at handling moving subjects while others provide superior results with static subjects.
ISO and Exposure Considerations
Macro photography often requires higher ISO settings due to the combination of smaller apertures and the need for faster shutter speeds to freeze subject movement. Modern cameras handle ISO 800-1600 quite well, and the slight noise trade-off is usually worthwhile for achieving sharp, properly exposed images.
When working with natural light, consider the quality and direction of illumination. Overcast skies provide beautiful, even lighting for outdoor macro work, while harsh sunlight can create problematic shadows and contrast.
Lighting Techniques for Macro Photography
Natural Light Mastery
Working with available light requires understanding how to modify and control existing illumination. Reflectors can fill in shadows and create more even lighting across your subject. A simple white piece of paper or commercial reflector positioned opposite your main light source can dramatically improve your results.
Diffusion is equally important when working in bright conditions. A translucent diffuser placed between your subject and the light source creates softer, more flattering illumination that reveals detail without harsh shadows.
Flash Photography for Macro
Flash provides consistent, controllable lighting that’s particularly valuable for macro photography. Ring flashes mount around your lens barrel and provide even, shadowless illumination that’s perfect for scientific documentation but may appear flat for artistic work.
Twin flash systems offer more creative control, allowing you to position two small flashes independently around your subject. This setup enables you to create dimensional lighting with controllable shadows and highlights.
Essential flash techniques:
- Use flash diffusion to soften harsh light
- Experiment with flash positioning for dimensional lighting
- Consider flash exposure compensation for natural-looking results
- Use rear curtain sync when combining flash with ambient light
Composition and Creative Techniques
Finding Compelling Subjects
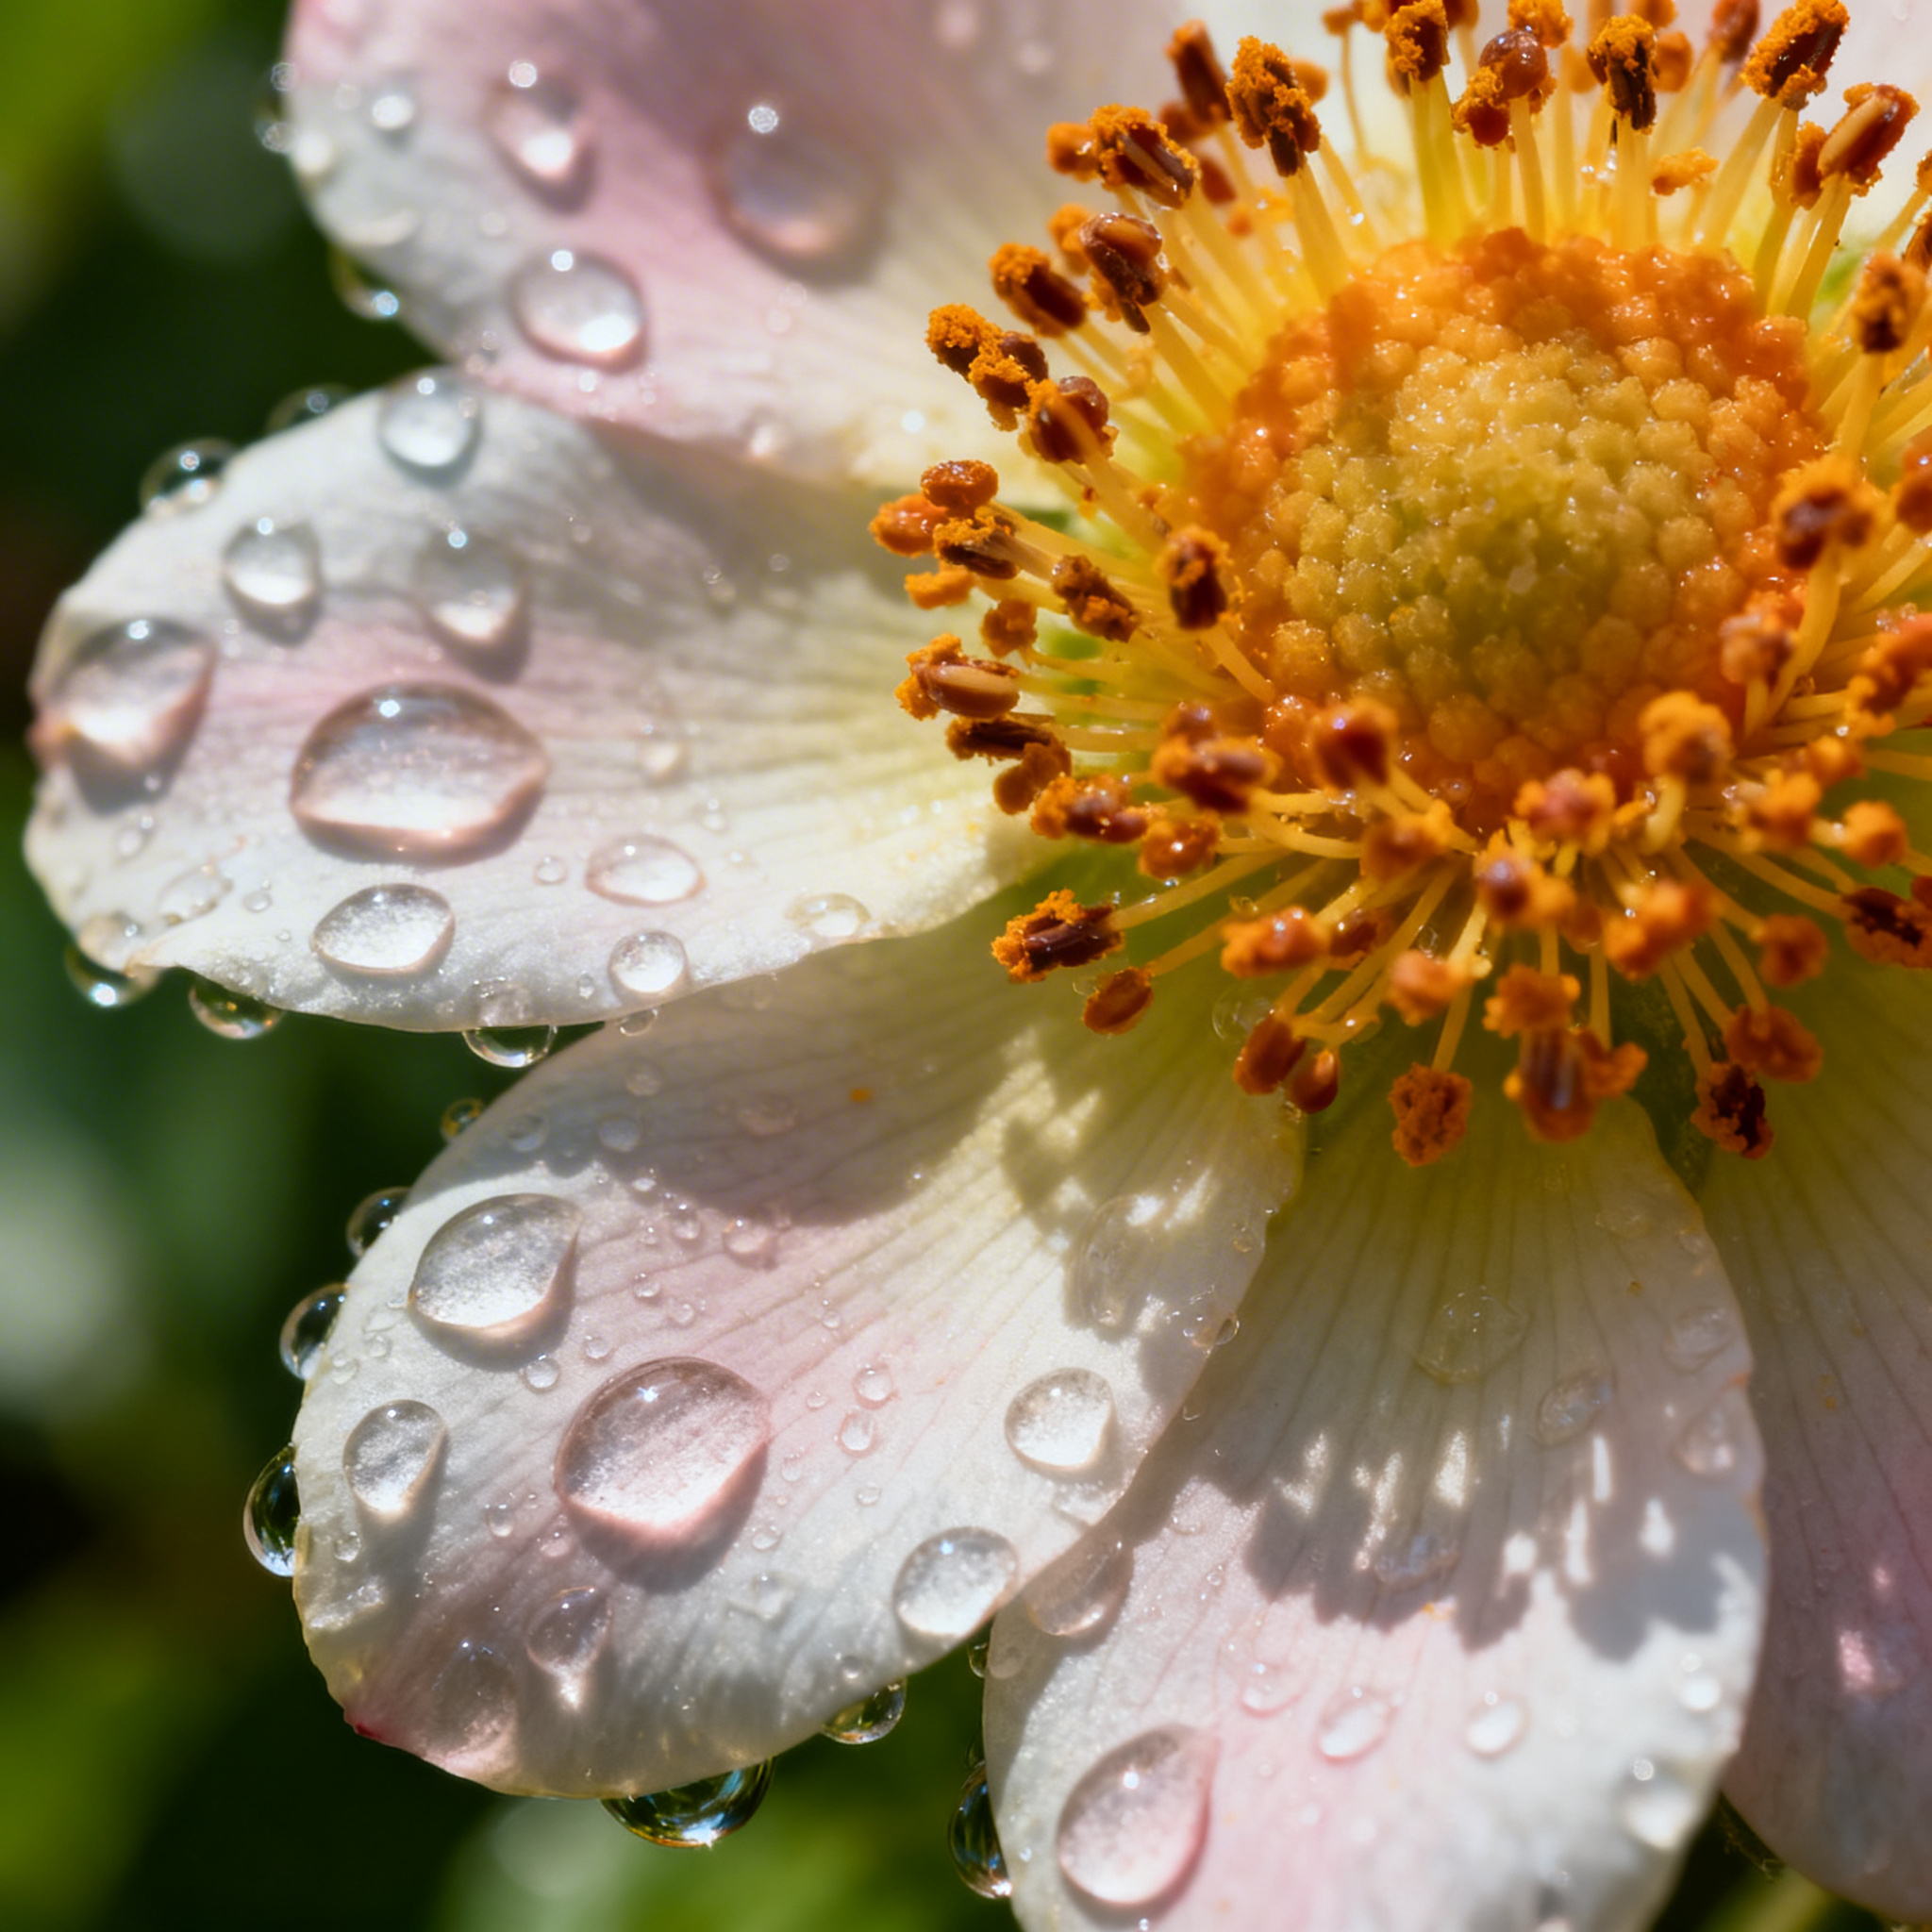
Macro photography transforms ordinary objects into extraordinary subjects. Look for interesting textures, patterns, colors, and forms in your everyday environment. Water droplets, flower structures, insect details, and even household objects can become fascinating macro subjects.
The key is training your eye to see potential in small details. Spend time exploring your subjects from different angles and distances before committing to a particular composition.
Background Management
Backgrounds play a crucial role in macro photography, often making the difference between average and outstanding images. The shallow depth of field characteristic of macro work naturally blurs backgrounds, but you still need to pay attention to distracting elements.
Position yourself to place simple, complementary backgrounds behind your subjects. Small adjustments in camera angle can eliminate distracting elements or change the background color entirely. Consider using colored paper or fabric as artificial backgrounds for complete control.
Creative Shooting Angles
Don’t limit yourself to eye-level perspectives. Macro photography allows you to explore subjects from angles impossible at normal viewing distances. Shoot from below looking up, get directly overhead, or find side-lighting opportunities that reveal texture and form.
Low angles can isolate subjects against the sky for clean backgrounds, while overhead shots reveal patterns and symmetry often hidden from normal viewing angles.
Working with Living Subjects
Insect Photography Tips
Photographing insects requires patience, preparation, and understanding of your subjects’ behavior. Early morning and late evening are ideal times when insects are less active due to cooler temperatures.
Move slowly and deliberately when approaching insects. Quick movements will send them flying, while gradual approaches often allow you to get surprisingly close. Learn about your subjects’ habits – some insects are more tolerant of human presence than others.
Practical insect photography workflow:
- Scout locations where insects are commonly found
- Arrive early when temperatures are cooler
- Set up your equipment before approaching subjects
- Use longer focal length macro lenses for more working distance
- Focus manually for faster, more precise control
- Take multiple shots since insects move unpredictably
Flower and Plant Macro Photography
Plants offer more cooperative subjects for macro photography, but they present their own challenges. Wind movement is the primary concern – even slight breezes can make focusing and composition difficult.
Use windbreaks made from cardboard or plastic to shield delicate subjects. A flash can freeze slight movement that might cause blur with natural light alone. Consider the time of day carefully, as some flowers open and close at specific times.
Advanced Macro Techniques
Extreme Close-Up Photography
Beyond 1:1 magnification lies the realm of extreme macro photography, where magnifications of 2:1, 5:1, or even higher reveal incredible detail. These extreme ratios require specialized techniques and equipment.
Stacking extension tubes, using reversed lenses, or employing microscope objectives adapted to camera mounts can achieve extreme magnifications. However, working distance becomes extremely short, and depth of field is measured in fractions of millimeters.
Creative Effects and Artistic Vision
Macro photography offers numerous opportunities for creative expression beyond simple documentation. Experiment with selective focus, where only a tiny portion of your subject is sharp, creating an artistic interpretation rather than a literal representation.
Water droplets act as natural magnifying glasses, creating images within images. Backlighting can transform translucent subjects into glowing works of art. Multiple exposures can create ethereal, dreamlike effects that transcend reality.
Post-Processing for Macro Images
Essential Adjustments
Macro images often benefit from specific post-processing techniques. Sharpening becomes critical due to the high level of detail and magnification. Use capture sharpening to optimize your raw files, then apply output sharpening based on your final use.
Color correction may be necessary, especially when working with artificial lighting or mixed light sources. Pay attention to color casts that can rob your images of their natural appeal.
Focus Stacking Workflow
Processing focus-stacked images requires specialized software and techniques. Start with properly exposed, sharp individual frames. Align images carefully to account for any slight movement between frames.
Most focus stacking software offers multiple blending algorithms. Experiment with different options to find what works best for your subjects and shooting style. Manual retouching may be necessary to perfect the final result.
Troubleshooting Common Macro Photography Problems
Camera Shake and Motion Blur
Camera stability becomes critical at macro magnifications where the tiniest movement is magnified along with your subject. Use proper tripod technique, including hanging weight from the center column for added stability. Mirror lock-up or electronic first curtain can eliminate vibration from the camera’s internal mechanisms.
When handheld shooting is necessary, use proper stance and breathing techniques. Lean against solid objects when possible, and time your shots for the natural pause between breaths.
Achieving Critical Focus
Autofocus systems often struggle with macro subjects, particularly in low contrast situations. Switch to manual focus for more reliable results. Use live view magnification to check focus critically, and consider focus peaking if your camera offers this feature.
The plane of focus becomes extremely important in macro work. Ensure that the most critical part of your subject falls within the narrow depth of field. Sometimes this means compromising on composition to prioritize the most important details.
Lighting Challenges
Macro photography often involves working in challenging lighting conditions. The close working distances can block natural light, creating shadows exactly where you need illumination most.
LED panels provide constant light sources that allow you to see exactly how shadows and highlights fall across your subject. They’re particularly useful when focus stacking, as they don’t require recycle time between shots like flash units.
Building Your Macro Photography Skills
Practice Exercises
Develop your macro skills through structured practice exercises. Start with stationary subjects like flowers, coins, or household objects before progressing to moving subjects like insects.
Create a macro photography project that challenges you to find interesting subjects in a specific location, such as your backyard or a local park. This constraint forces creative problem-solving and helps develop your observational skills.
Studying Masters of Macro Photography
Learn from accomplished macro photographers by studying their techniques and approaches. Analyze their use of light, composition, and subject selection. Understanding how masters solve common macro photography challenges accelerates your own learning process.
Join macro photography communities online where you can share your work, receive feedback, and learn from other enthusiasts. The macro photography community is generally very supportive and willing to share techniques and locations.
Conclusion and Next Steps
Macro photography opens up a fascinating world of photographic opportunities that exist right under our noses. By mastering the fundamental techniques covered in this guide – proper equipment use, camera settings, lighting, and composition – you’ll be well-equipped to create stunning close-up images that reveal the hidden beauty in our world.
Start with simple subjects and basic equipment, then gradually expand your toolkit and tackle more challenging subjects as your skills develop. Remember that macro photography is as much about patience and observation as it is about technical proficiency. Take time to really study your subjects and understand their characteristics before pressing the shutter.
The key to success in macro photography lies in consistent practice and experimentation. Don’t be afraid to try new techniques, explore different subjects, and push the boundaries of what’s possible with your equipment. Every macro photography session offers opportunities to learn something new and capture images that showcase the incredible detail and beauty that exists at the smallest scales.
Whether you’re drawn to the scientific documentation aspect of macro photography or its artistic possibilities, the techniques outlined in this guide will serve as your foundation for creating compelling close-up images that engage and inspire your viewers.
Related Tags
Looking for the Best Camera Deals?
Check out our latest buying guides and comparison articles to find the perfect camera for your needs.
Browse Buying Guides