Master Macro Photography: 7 Techniques for Stunning Close-Ups
Learn essential macro photography techniques to capture breathtaking close-up images. Discover lighting, focus, and composition tips for pro results.
What is Macro Photography?
Macro photography is the art of capturing extreme close-up images that reveal intricate details invisible to the naked eye. Traditionally defined as photography at 1:1 magnification or greater, macro photography transforms everyday subjects like flowers, insects, and textures into captivating works of art. This specialized technique opens up an entirely new world of creative possibilities, allowing photographers to explore the fascinating micro-universe that surrounds us.
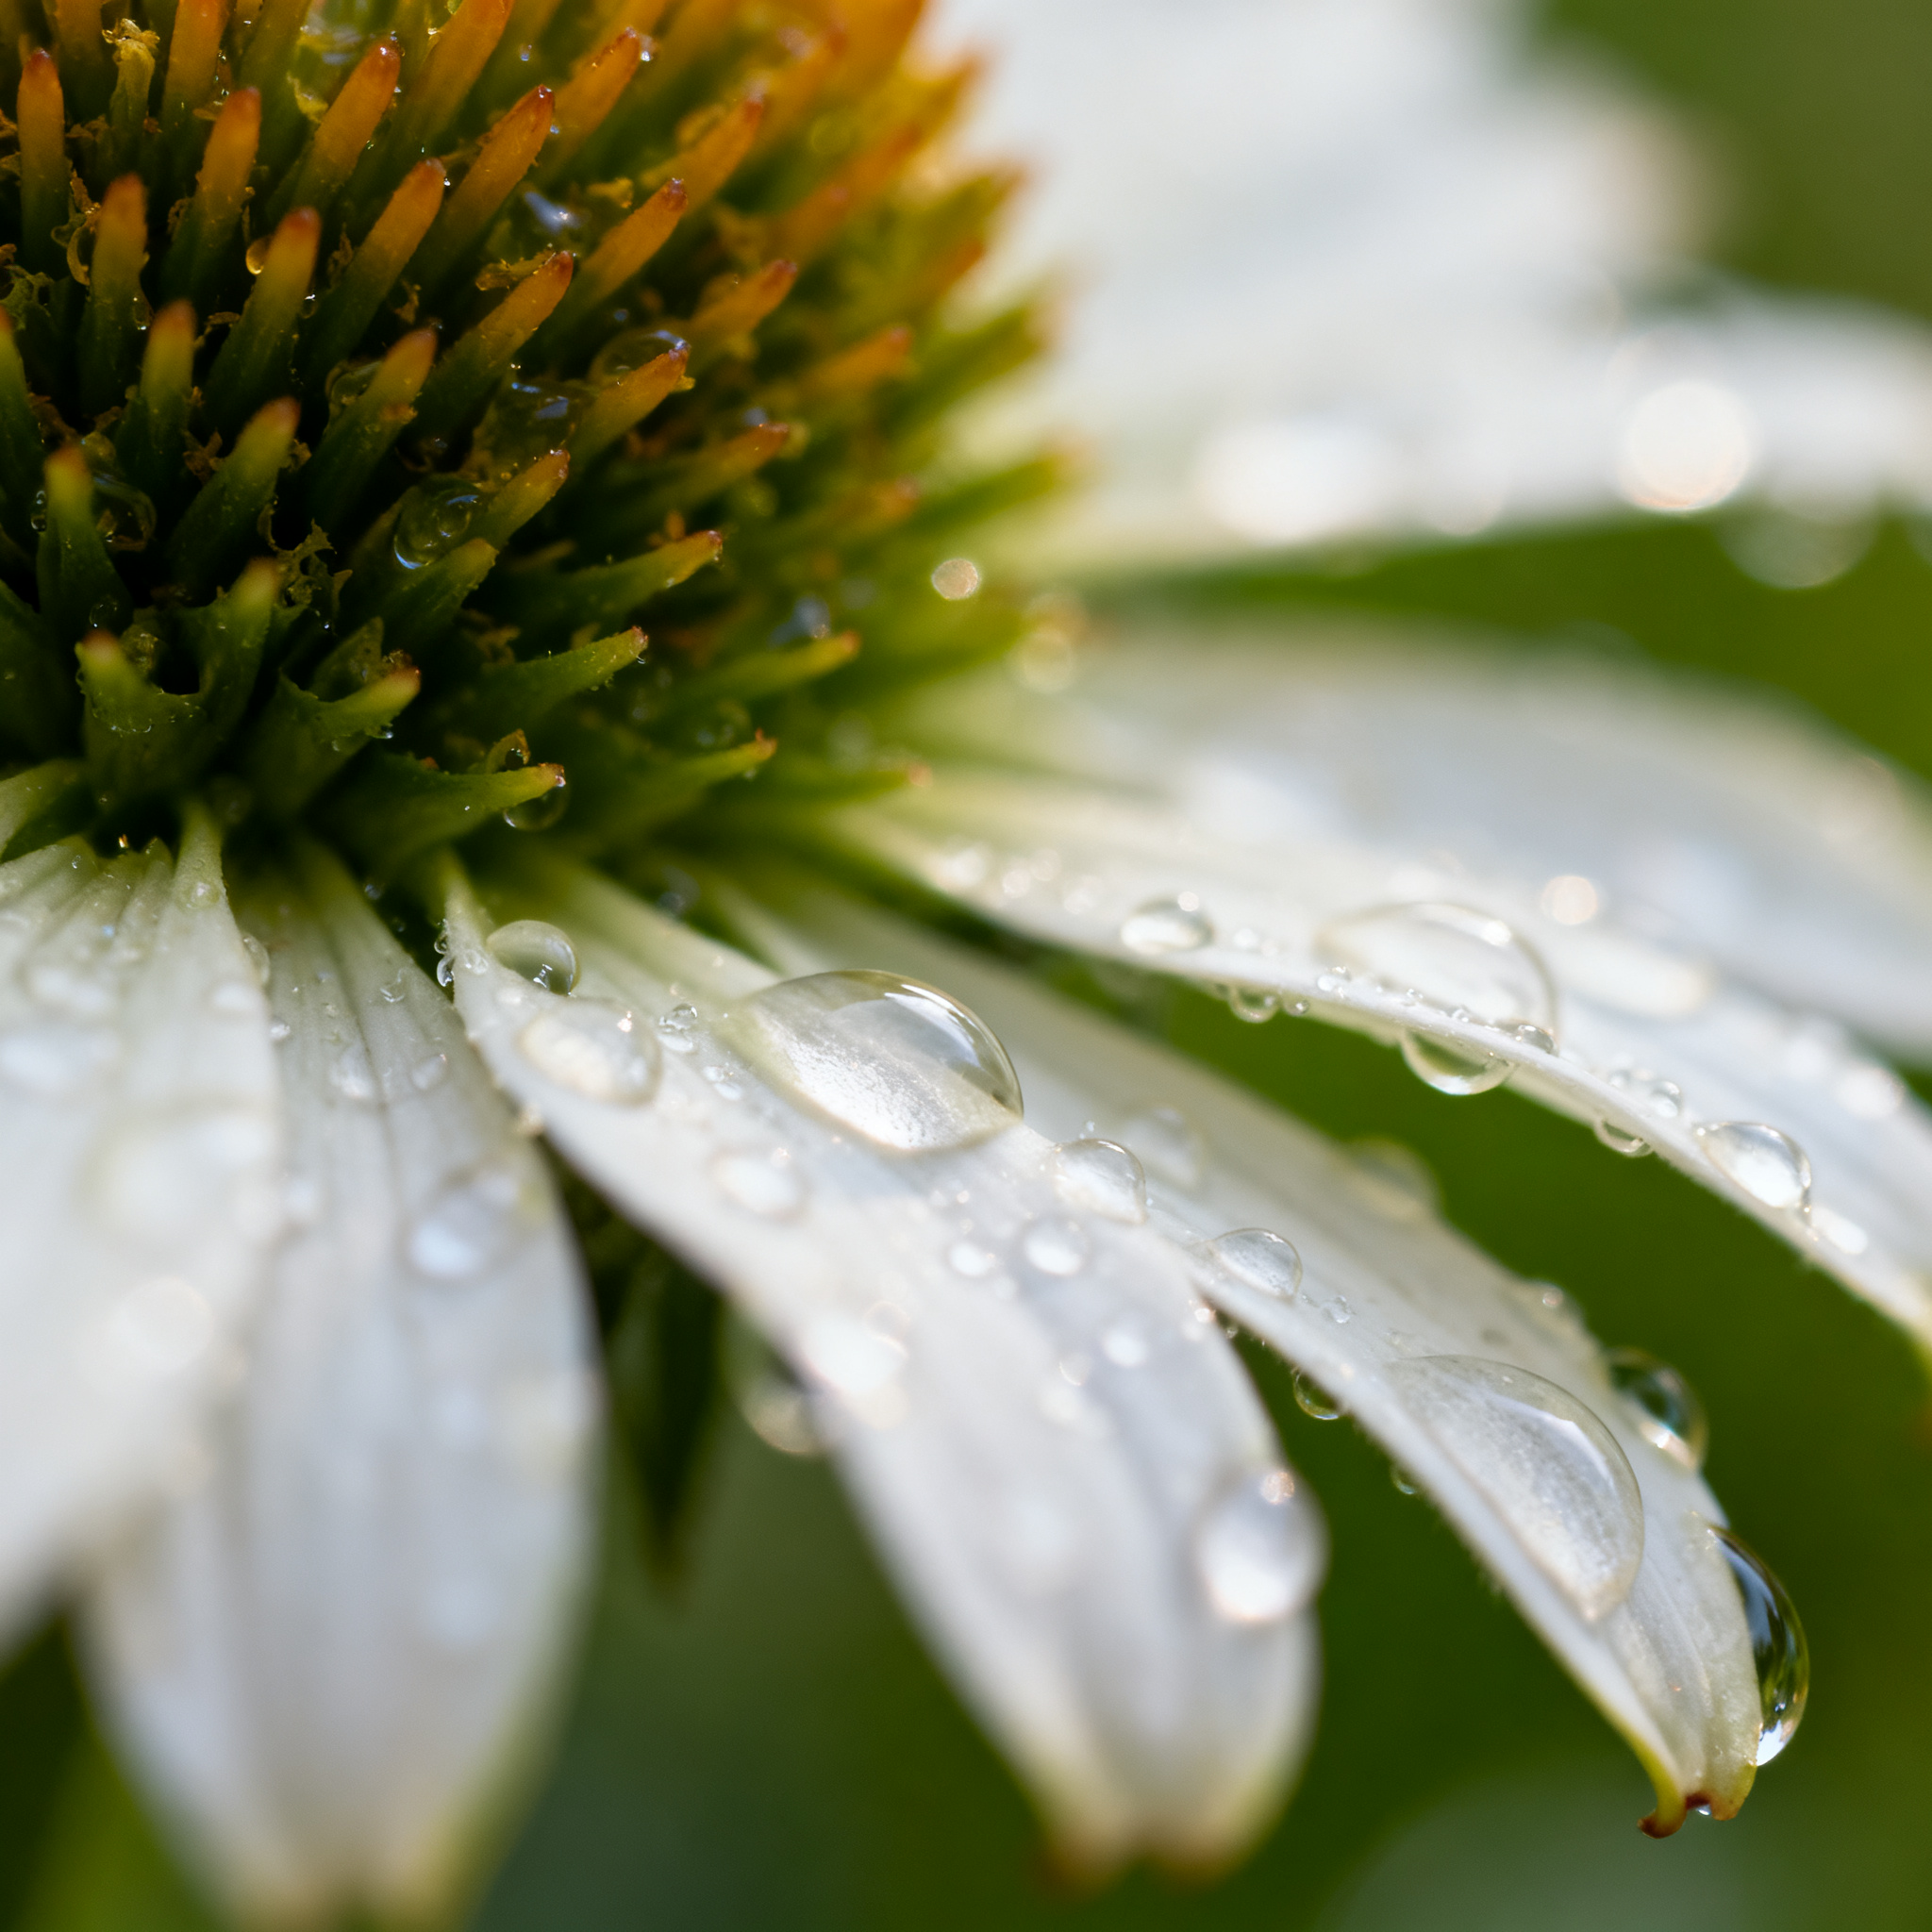
The beauty of macro photography lies in its ability to showcase extraordinary detail in ordinary subjects. A water droplet becomes a crystal sphere, flower petals reveal their delicate textures, and insects display their remarkable anatomical features. This genre of photography requires patience, precision, and the right equipment to achieve truly stunning results.
Essential Equipment for Macro Photography
Macro Lenses: Your Primary Tool
The foundation of exceptional macro photography begins with the right lens. True macro lenses are specifically designed to focus extremely close to subjects while maintaining sharp image quality. These lenses typically offer magnification ratios of 1:1 (life-size) or greater, meaning the subject appears the same size on your camera sensor as it does in real life.
Popular focal lengths for macro lenses include 60mm, 90mm, 100mm, and 105mm. Longer focal lengths provide greater working distance between you and your subject, which is particularly beneficial when photographing skittish insects or when you need to avoid casting shadows on your subject.
Camera Bodies That Excel at Macro Work
While macro photography can be accomplished with most modern cameras, certain features make the process significantly easier. Full-frame cameras like the Sony A7 IV offer excellent image quality and advanced focusing systems that are invaluable for macro work. The high-resolution sensor and sophisticated autofocus capabilities help ensure your close-up shots are tack sharp where it matters most.
Supporting Equipment
Tripods: A sturdy tripod is crucial for macro photography, as even the slightest camera movement can result in blurred images at high magnifications. Look for tripods with legs that can spread wide and low, allowing you to get close to ground-level subjects.
Extension Tubes: These hollow rings mount between your camera body and lens, allowing regular lenses to focus closer than their minimum focusing distance. While they don’t contain optical elements, they effectively increase magnification by moving the lens farther from the sensor.
Close-up Filters: These screw-on filters act like magnifying glasses for your lens, enabling closer focusing. While convenient and affordable, they may compromise image quality compared to dedicated macro lenses.
Ring Flash or LED Panels: Specialized lighting equipment designed for macro photography helps illuminate subjects evenly without harsh shadows. Ring flashes mount around the front of your lens, while LED panels offer continuous lighting for easier focusing.
Camera Settings for Macro Photography
Aperture: Balancing Depth of Field and Sharpness
Aperture selection in macro photography is a delicate balancing act. While you might instinctively reach for the widest aperture for maximum light gathering, macro work often demands smaller apertures to achieve sufficient depth of field.
At 1:1 magnification, depth of field becomes extremely shallow – sometimes measuring just millimeters. Start with apertures between f/8 and f/11 for a good balance of depth of field and sharpness. These apertures typically provide the sweet spot where most lenses perform at their optical best while still offering manageable depth of field.
For subjects requiring maximum detail throughout, don’t hesitate to use f/16 or even f/22, though be aware that diffraction may begin to soften the image at these smaller apertures.
Shutter Speed Considerations
Macro photography magnifies not only your subject but also camera shake and subject movement. A general rule of thumb is to use a shutter speed at least equivalent to your focal length. For a 100mm macro lens, aim for 1/100th of a second or faster.
When working with living subjects like insects, faster shutter speeds become even more critical. Speeds of 1/250th or 1/500th of a second help freeze subtle movements that could otherwise ruin your shot.
ISO Settings for Clean Images
Modern cameras handle high ISOs remarkably well, but macro photography benefits from keeping ISO as low as possible to maintain maximum image quality and detail. Start with ISO 100 or your camera’s base ISO setting.
When shooting handheld or with moving subjects, don’t hesitate to raise ISO to achieve the shutter speeds you need. It’s better to have a sharp image with some noise than a blurry image with perfect noise characteristics.
Focus Modes and Techniques
Single Point Autofocus: Use single-point autofocus mode and manually select your focus point for maximum precision. This gives you complete control over exactly where the camera focuses.
Manual Focus: Many macro photographers prefer manual focus for ultimate precision. Use your camera’s magnification feature (if available) to zoom in on your subject while focusing.
Focus Stacking: For subjects requiring extensive depth of field, consider focus stacking – taking multiple images at different focus points and blending them in post-processing.
Lighting Techniques for Macro Photography
Natural Light Mastery
Natural light can produce stunning macro photographs when used skillfully. Overcast days provide beautifully diffused light that’s perfect for flower photography and other static subjects. The soft, even illumination eliminates harsh shadows while bringing out subtle colors and textures.
Golden hour light adds warmth and drama to macro subjects, but requires careful positioning to avoid extreme contrasts. Early morning dew on flowers and spider webs creates magical opportunities when backlit by gentle sunrise light.
Flash Photography for Macro
Flash becomes particularly useful in macro photography for several reasons: it provides ample light for small apertures, freezes subject movement, and allows for consistent lighting conditions regardless of ambient light.
Ring Flash: Mounts directly on your lens and provides even, shadowless lighting. While sometimes criticized for creating flat lighting, ring flash is excellent for scientific documentation and situations where even illumination is paramount.
Twin Flash Setup: Uses two small flash units positioned on either side of your lens, allowing for more dimensional lighting with controlled shadows. This setup offers greater creative control than ring flash while maintaining portability.
Off-Camera Flash: Position flash units away from your camera for more natural-looking light. Use diffusers, reflectors, and multiple lights to create professional-quality macro images with excellent dimension and texture.
DIY Lighting Solutions
Diffusion Materials: White fabric, parchment paper, or commercial diffusion panels soften harsh light sources. Position these between your light source and subject for gentler illumination.
Reflectors: White cards, small mirrors, or commercial reflectors bounce light into shadow areas, reducing contrast and revealing detail in darker portions of your subject.
LED Panels: Continuous LED lights allow you to see exactly how light falls on your subject, making it easier to achieve perfect lighting before taking the shot.
Composition Tips for Macro Photography
Rule of Thirds in Miniature
The rule of thirds applies to macro photography just as it does to landscape or portrait work. Position key elements of your subject along the intersecting lines of an imaginary grid dividing your frame into thirds. For flower photography, consider placing the center of the bloom at one of these intersection points rather than dead center in the frame.
Background Considerations
In macro photography, backgrounds can make or break an image. A cluttered or distracting background draws attention away from your subject, while a clean, complementary background enhances your main subject.
Depth of Field Control: Use wide apertures to blur distracting backgrounds into smooth, creamy bokeh. The extremely shallow depth of field at macro magnifications can turn even busy backgrounds into pleasant abstract colors.
Background Selection: Position yourself to place simple, uncluttered areas behind your subject. A patch of blue sky, distant foliage, or a shadowed area can provide excellent contrast for your main subject.
Artificial Backgrounds: Carry colored cards or fabric to place behind subjects when natural backgrounds are too distracting. This technique works particularly well with flower photography.
Leading Lines and Patterns
Look for natural lines and patterns within your macro subjects. Leaf veins, flower petals, insect wing patterns, and water droplet formations all create compelling compositional elements that guide the viewer’s eye through your image.
Negative Space
Don’t feel compelled to fill every inch of your frame with subject matter. Strategic use of negative space – areas of the image without detail – can make your main subject more prominent and create a more powerful visual impact.
Common Challenges and Solutions
Camera Shake and Stability
Problem: At high magnifications, even the slightest movement creates blur.
Solutions:
- Use a sturdy tripod with a quality ball head
- Enable mirror lock-up or electronic first curtain shutter
- Use a remote shutter release or your camera’s self-timer
- Improve your handheld technique by bracing against solid objects
- Consider image stabilization lenses when shooting handheld
Shallow Depth of Field
Problem: Critical parts of your subject fall outside the narrow depth of field.
Solutions:
- Use smaller apertures (f/8-f/16) for increased depth of field
- Focus stack multiple images for extensive sharp areas
- Carefully choose your focusing point to maximize the effective depth of field
- Position your camera parallel to important subject details
Subject Movement
Problem: Living subjects move during exposure, creating blur.
Solutions:
- Use faster shutter speeds (1/250s or higher)
- Employ flash to freeze movement
- Work during cooler parts of the day when insects are less active
- Be patient and take multiple shots
- Consider the subject’s behavior patterns to predict movement
Lighting Difficulties
Problem: Inadequate light for proper exposure or harsh shadows obscuring detail.
Solutions:
- Supplement natural light with flash or LED panels
- Use reflectors to fill shadow areas
- Shoot during overcast conditions for naturally diffused light
- Create your own diffused light with translucent materials
- Master multiple flash setups for complete lighting control
Focus Stacking for Extended Depth of Field
Focus stacking is a powerful technique that combines multiple images taken at different focus points to create a final image with extended depth of field. This method is particularly valuable in macro photography where achieving sufficient depth of field through aperture alone is often impossible.
The Focus Stacking Process
- Setup: Mount your camera on a sturdy tripod and compose your shot
- Camera Settings: Use manual focus and consistent exposure settings
- Focusing: Take multiple shots, adjusting focus slightly between each frame
- Coverage: Ensure your focus range covers all important subject areas
- Post-Processing: Use specialized software to blend the sharp areas from each image
Focus Stacking Tips
- Take more images than you think you need – better to have too many than miss critical focus points
- Use smaller apertures (f/8-f/11) for optimal lens performance in each individual frame
- Maintain consistent lighting throughout the sequence
- Use manual exposure to prevent brightness variations between frames
- Consider dedicated focus stacking rails for precise focusing adjustments
Post-Processing for Macro Images
Essential Adjustments
Sharpening: Macro images often benefit from careful sharpening to enhance fine details. Use output sharpening appropriate for your intended display medium.
Noise Reduction: When higher ISOs are necessary, apply noise reduction selectively to maintain detail in important areas while cleaning up smooth backgrounds.
Color Enhancement: Subtle color adjustments can make macro subjects more vibrant. Be careful not to over-saturate, as this can make images look unnatural.
Contrast and Clarity: Local contrast adjustments can help emphasize textures and patterns in macro subjects.
Advanced Techniques
Focus Stacking: Specialized software like Helicon Focus or Photoshop’s auto-blend layers feature can combine multiple focus points into a single sharp image.
Background Replacement: Sometimes the perfect subject appears against a less-than-perfect background. Learn to extract subjects and place them against more suitable backgrounds.
Detail Enhancement: Techniques like orton effects, clarity adjustments, and selective sharpening can emphasize the intricate details that make macro photography so compelling.
Subject Ideas and Seasonal Opportunities
Spring Subjects
Spring offers incredible macro photography opportunities as nature awakens. Fresh flower buds, emerging leaves, morning dew, and increased insect activity provide abundant subject matter. Focus on the delicate details of new growth and the vibrant colors of spring blooms.
Summer Macro Photography
Summer brings mature flowers, active insects, and interesting weather patterns. Water droplets from summer storms, fully developed flower structures, and busy insect life create diverse photographic opportunities. Early morning sessions often yield the best results before heat affects both photographer and subjects.
Autumn Opportunities
Fall provides unique textures, colors, and subjects. Frost patterns, changing leaves, late-season flowers, and preparing-for-winter insects offer compelling macro subjects. The changing light conditions of autumn can add drama to your images.
Winter Macro Work
Winter macro photography focuses on ice formations, frost patterns, evergreen details, and the few hardy subjects that remain active. Snow crystals, ice formations, and winter plant structures provide opportunities for striking minimalist compositions.
Conclusion
Macro photography opens up an incredible world of creative possibilities, transforming the ordinary into the extraordinary through careful observation and technical skill. Success in this challenging but rewarding field requires patience, practice, and attention to detail.
Start with basic equipment – even extension tubes on existing lenses can provide excellent results while you develop your skills. Focus on mastering fundamental techniques like proper exposure, sharp focusing, and effective composition before investing in specialized equipment.
Remember that great macro photography is as much about seeing as it is about technical execution. Train your eye to notice the small details and patterns that others might overlook. With time and practice, you’ll develop the ability to create stunning close-up images that reveal the hidden beauty in our world.
Whether you’re drawn to the delicate structure of flowers, the fascinating world of insects, or abstract patterns in everyday objects, macro photography offers endless opportunities for creative expression. Take your time, experiment with different approaches, and most importantly, enjoy the process of discovery that makes macro photography so uniquely rewarding.
The investment in quality equipment like the Sony A7 IV combined with dedicated macro lenses will serve you well as you develop your skills and create increasingly impressive images. Start close to home – your backyard or local park likely contains more macro photography opportunities than you might imagine.
Related Tags
Looking for the Best Camera Deals?
Check out our latest buying guides and comparison articles to find the perfect camera for your needs.
Browse Buying Guides