Introduction
Announced at the same time as its sibling, the Z6 II, the new Nikon Z7 II full-frame mirrorless camera is designed to be an evolution from the original Z7, rather than a dramatic overhaul.
Nikon says that it has listened to customer feedback from the first generation to bring a number of small, but significant, upgrades to its newest top-end model. The Z7 II, unlike the Z6 II, is aimed primarily at professional photographers, or high-end enthusiasts with a fairly big budget, as opposed to the more consumer-friendly Z6 II.
Although none of the upgrades are overly dramatic, if you add them all together, it makes for quite an interesting proposition – especially if any of these niggles on the first version of the Z7 put you off buying it, or you’re thinking of getting a second body.
Along with the changes, some things have stayed exactly the same. The prime example is the sensor, which is the same 45.7 megapixel full-frame back-illuminated device as found in the original Nikon Z7.
There’s also the same 493-point AF system set-up, though new face/animal detection modes have been added, and it’s also said to be improved when it comes to tracking and focus acquisition in low light.
A new introduction to the Z7 Mark II is an additional Expeed 6 processor, so that the camera has dual processors, instead of one. This gives improvements to video – which can now record at up to 60p in 4K, and to burst shooting, which has increased to 10fps (from 9fps), with the added benefit of an faster-clearing buffer.
Probably the feature that received the most criticism, especially with the pro-level Z7, was the single XQD/CFExpress card slot. Nikon has addressed that by adding a UHS-II SD card slot for both the Z7 II and the Z6 II, which is designed to give photographers peace of mind. It also means that anybody new to this format doesn’t necessarily have to shell out immediately for a more expensive XQD/CFExpress card.
There are also some new accessories which can be used with the Z7 II (and the Z6 II), which includes a new battery grip and a new wireless remote.
At the time of writing, the Z7 II retails for around £2,999 / $2,995 body only, while the original Z7 can be picked up for £2,319 / $2,496.
If you prefer, you can pick up the Z7 II as part of a kit with the 24-70mm f/4 lens, for £3,549 / $3,596 – compared to £2,999 / $3,096 for the original Z7.
You can also buy the Z7 II as part of a kit with the FTZ lens mount adapter, which enables the use of existing DSLR lenses with the Z7 II. That will set you back £3,139, or you can buy all three together (Z7 II + 24-70mm + FTZ) for £3,679. By contrast, the Z7 (+FTZ) will cost £2,519, or £2,919 (+24-70mm & FTZ).
Ease of Use
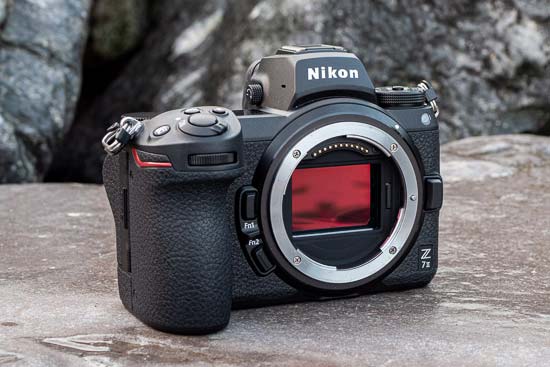 |
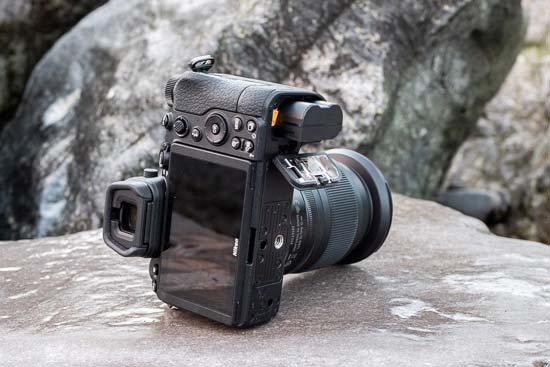
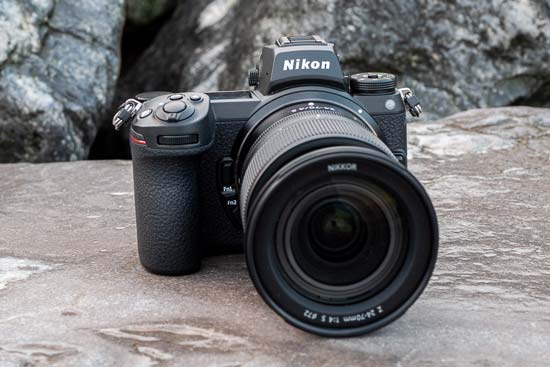
Unsurprisingly, the Nikon Z7 II has almost the same body design as its predecessor – as well as the Z6 / Z6 II cameras. It is ever so slightly deeper (by a couple of mm) and 25g heavier, which presumably is to accommodate the extra card slot – a very worthwhile trade off for the extra security that it provides.
If you’ve used the either of the previous Z6/Z7 series cameras, you’ll know what to expect here. In essence, it’s a shrunken down version of a Nikon DSLR, which still ends up being satisfyingly chunky and with enough room for all the dials and buttons to breathe on the camera’s body.
We’ll go through how each of the buttons works as we progress through the review. A premium covering surrounds the Z7 II’s chassis, which helps with the high-end feel, and it also feels very comfortable in your hand thanks to an ergonomically built design.
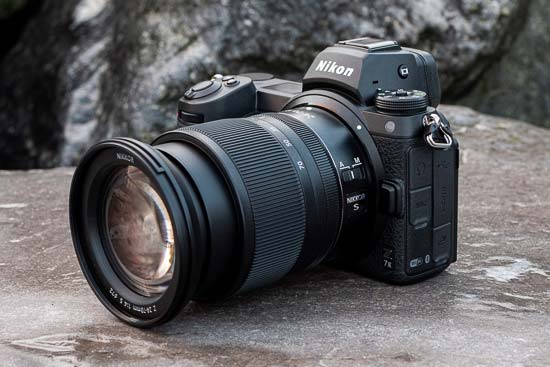
The front grip is complemented by a rear thumb rest. Most of the camera’s buttons and dials are gathered on the right hand side of the rear of the camera, which means you can make the vast majority of changes with your right hand – in fact it’s even possible to use the camera one-handed fairly comfortably, especially if you’re using one of the lighter Z series lenses (such as the 24-70mm f/4).
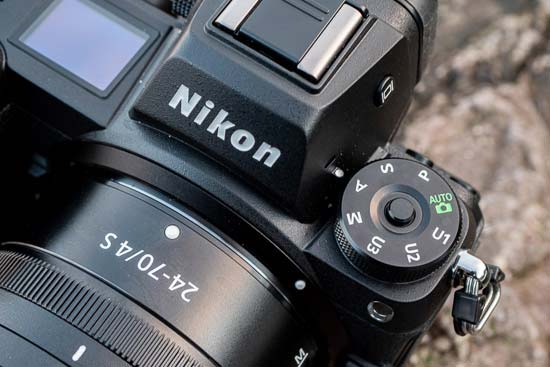
We’ll look at the top dial in more detail first. To the left you’ll find the camera’s mode dial. This fairly large dial houses all of the standard manual and semi-automatic modes (PASM), plus fully automatic, and three slots for user-customised settings.
 |
These will be particularly welcomed by any photographer who consistently finds themselves shooting in the same condition and wants to quickly jump to the correct set up – such as low light. The dial can’t be accidentally moved as a button in the middle needs to be pushed down before you can rotate it.
To the right of the viewfinder we have the top-plate LCD. This is extremely handy for showing you all of the key settings at a glance, such as aperture, shutter speed, drive mode, ISO, remaining shot count and battery life.
At the top of the front grip you’ll find the camera’s on/off switch, which surrounds the shutter release. Just behind here there are three dedicated buttons, one for video recording, one for ISO and one for exposure compensation.
Finally, just above the rear thumb rest, you’ll find a large scrolling dial, which can be used in conjunction with the dial on the front grip to control the camera’s key settings – depending on which shooting mode you’re in. In manual mode, the default set up is for the front dial to control aperture, while the rear dial is used to adjust shutter speed.
On the front of the Z7 II, there are two customisable function buttons, which can be assigned to a number of different settings depending on your shooting preferences. There’s also the lens release button which allows you to switch between the various lenses you might have.
 |
Now to move to the back of the camera, and again, if you’ve used a Nikon Z series camera before, or even a Nikon DSLR, you’ll be very at home here. If you haven’t, it’s fairly user friendly, being a relatively straightforward set up.
To the left of the viewfinder, you’ve got the playback button and the delete button. These are two buttons you don’t need to use to make changes to shooting settings, and as such, it’s fine that they’re out of the way here.
On the viewfinder itself, there is another button for adjusting how the viewfinder works – whether you want it to automatically activate, switch off the screen, or not have the viewfinder on at all. On the opposite side of the viewfinder you’ve got the diopter adjustment dial which you can use to align the viewfinder with your own vision.
The rest of the camera’s buttons are all grouped together on the right of the viewfinder / screen setup. It starts with a display button which, unsurprisingly, you can use to adjust how the rear screen display looks – including switching on/off shooting information, a histogram and a level.
You can also adjust the viewfinder display by pressing the same button while your eye is held up to the viewfinder. That means that you can have different display options depending on whether you’re using the screen or the viewfinder, if you like.
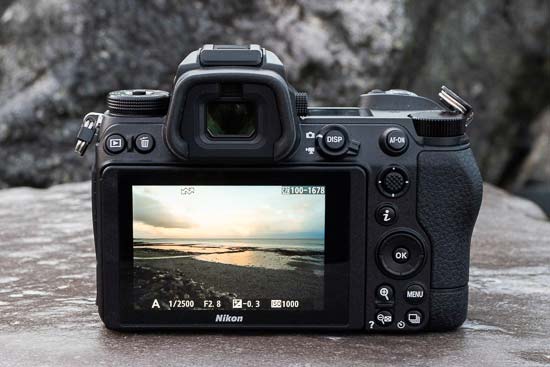 |
Around the Display button is a switch when you can use to move between video mode and stills mode. This switch is fairly stiff, so it seems reasonably unlikely you’d do this by accident – but if you do, it should be fairly obvious that you’re in the wrong mode. To the right of the Display button is the AF-On button. You can set this up for back-button focusing if you prefer to work in that way, which will mean that if you press the shutter release, it won’t attempt to refocus again – useful for focusing and recomposing.
Just underneath the AF-On button is a joystick. You can use this to move the AF point around the frame, if you don’t want to use the touchscreen. Unlike some other models on the market, you can’t use the viewfinder and touchscreen at the same time – so it’s very likely you’ll be using the joystick to make quick AF point changes. The joystick can also be used to move around either the main menu or the quick menu, but you will first need to enable this option in the custom control settings section of the menu.
The quick menu itself can be accessed by pressing the “I” button just underneath the viewfinder. By doing so, you’ll presented with a group of commonly used settings, such as Picture Control, Quality, Drive Mode, AF-Area Mode, White Balance and more. You can navigate around the menu using either the joystick (if set up) or via the navigational pad just underneath the stick.
Once on the correct setting, press OK and then you can use the scrolling dials to choose between the various options. If there are any settings in this quick menu you find you don’t use very often, you can take them out and replace them with other settings which perhaps you use more frequently.
The four way navigational pad, with an OK button in the middle, can be used to move the AF point around the screen (if you don’t want to use the joystick/touchscreen), navigate menu, to toggle the information display on images in playback, and to browse through said images. The OK button can be used for menu selection, but in shooting mode, you can also use it to reset the AF point to the centre of the screen.
 |
Just underneath the navipad is a duo of buttons which can be used to zoom in and out of the scene you’re photographing – particularly useful for checking critical focus, especially if you’re using manual focus. You can also use the buttons when viewing images in playback to zoom in and out, as an alternative to using the touchscreen to pinch in and out of the frame.
To the right of the zoom out button, there’s a drive mode button which you can use to quickly select one of the different drive modes – such as single shooting, Continuous, or the Timer mode.
The Menu button is found above the drive mode button, and it will take you into the camera’s main menu. This is where you should head when you need to make more complex settings than the quick menu will prove you with. The menu itself is divided into a number of categories, which are fairly self-explanatory and easy to navigate around.
There is Playback, Photo Shooting, Movie Shooting, Custom Settings and a Retouch Menu. Handily, there’s also a “My Menu” tab which is where you can save any settings which you are frequently using so you can quickly get to them whenever you need them, rather than scrolling through the various pages of the menu.
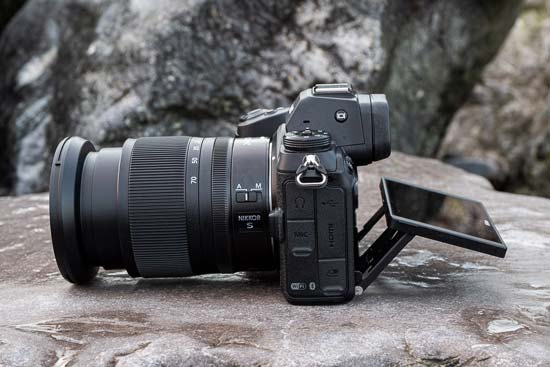
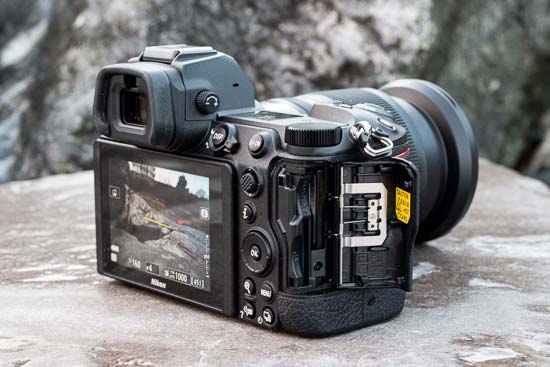
Both the viewfinder and the screen have stayed the same from the original Z7. So, you get a tilting, 3.2-inch, 2.1m-dot TFT touch-sensitive screen. You can pull the screen from the body of the camera and tilt it both downwards and upwards.
 |
It’s useful for composing from some awkward angles, but videographers will likely be disappointed not to have a screen which is fully-articulating or faces forwards. Only tilting up and down is also less useful for shooting portrait-format images.
The viewfinder meanwhile is a 0.5-inch, 3690k-dot OLED viewfinder which is bright and clear, giving you a good view of the scene. Since the Z7’s introduction a couple of years ago, there have been some better viewfinders come to the market, but this is still a good all-round performer, which works well in most conditions.
You’ll find all the camera’s ports on the left hand side of the camera, which includes a headphone and microphone jack, an HDMI port, a remote control port and a USB-C port which you can use for charging the camera in-body, if you don’t want to use an external battery charger.
A new feature for the Z7 II is the ability to charge the camera while it is recording stills/video which is perhaps most useful for videographers who might be running low while recording.
 |
On the opposite side of the camera is where you’ll find the dual card slots – probably the most welcome change for professional photographers. You can set up the card slots to work in whichever way you feel is best – whether that’s a straightforward backup/copy of the first card slot, an overflow to give you more space, or to have one card record one type of media (such as raw files) and the other to record another (such as still files or video).
As with the Z6 II, the vast majority of the improvements made to the Z7 II, are internal, rather than obvious external ones. Although the Z7 II uses the same number of autofocus points, Nikon says that AF has been improved, and we also now have Animal Detection AF, which has been programmed to work with dogs and cats, but should also work with other similar animals (such as foxes etc).
Burst shooting has also been improved, with the Z7 II being able to shoot at 10fps, instead of 9fps. Meanwhile, the buffer maxes out after 50 raw files, or 200 JPEGs.
 |
I found that when photographing with my dog, the Z7 II puts in a better tracking performance than the Z6 II, which is perhaps to do with the fact that it has a larger number of points across the frame than the Z6 II. However, neither camera performs as well as others on the market, such as the Canon EOS R6.
On the whole, the results can be a little hit and miss, as with the Z6 II. I tested it out by using it to track my dog running along a beach. The Z7 II got a few shots in focus, but there were also a fair few that didn’t quite hit the mark. Switching Animal Eye AF on certainly helps, but it’s also not foolproof. My dog is black, with dark eyes, so she is a particularly difficult test, but other cameras, such as the Canon EOS R6, have coped fine.
In other areas, such as low light, the Nikon Z7 II focuses quickly and accurately in most situations. Although it is said to be improved when compared with the original Z7, using them both side by side doesn’t reveal a huge difference, so if you’re an owner of the original, you shouldn’t expect to be blown away by a massive improvement.


